Whether you're coating a new substrate or repainting an existing one, it pays to use the correct products and procedures. Here is a guide to coating five of today's most popular exterior surfaces.
Fiber-cement
Fiber-cement siding, a combination of Portland cement, ground sand, cellulose fiber and select additives, holds paint exceptionally well. The siding is available either unprimed or preprimed.
If improperly treated, cement-based products can be mildew magnets. A high quality exterior acrylic masonry primer such as Sherwin-Williams Loxon Masonry Primer will fortify the siding's mildew and efflorescence resistance. Caulk at the butt joints and apply the finish coat.
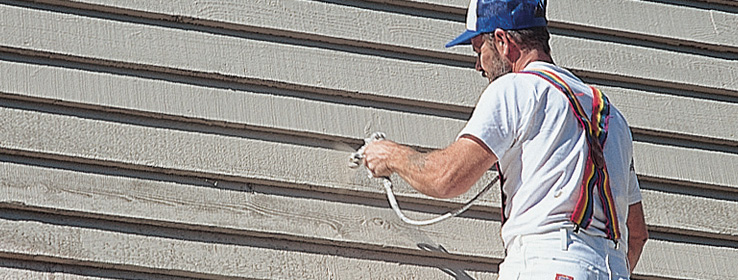
Sherwin-Williams Duration® Exterior Latex Coatings are the best topcoat choices for new fiber-cement siding. Because they have a substantially higher film build than conventional paints, only one coat is necessary over a primed surface – and Duration is guaranteed not to peel or blister. Other high-quality exterior latex paints designed for cement-based building materials – such as Sherwin-Williams Loxon Masonry Topcoat – also perform well but will require two coats. Loxon can be brushed, rolled or sprayed – spraying is most common in new construction.
When repainting fiber-cement siding, pressure clean with a minimum of 2100 psi pressure to remove all dirt, dust, grease, oil, loose particles, foreign material and defective coatings. Rinse thoroughly and allow to dry. Scrape away any remaining peeled or checked paint, and sand those areas. Also sand any glossy surfaces to make them dull.
Unless the substrate is exposed, a primer is not required when repainting fiber cement. One coat of Duration is all that's needed.
Cedar
Cedar shake or siding, as well as redwood, is best primed with an exterior oil-based wood primer (some regions must use a latex primer due to VOC regulations). A primer is essential – it will serve as a barrier coat to help prevent tannin bleed, a brownish or tan discoloration that can appear on a painted wooden surface. Before coating, make sure that new wood is dry enough to absorb sprinkled water before coating. Top the siding with one coat of Duration.
If you plan to stain the cedar, apply two coats of Sherwin-Williams WoodScapes Solid Color Acrylic Exterior House Stain. This waterborne product is easier to apply than alkyd or conventional latex stains – with no drips or runs. Available in acrylic solid colors or polyurethane semi-transparent shades, WoodScapes resists mildew and retains its color for several years.
One note of caution: Be careful if you decide to go with a semi-transparent stain because the shade of the substrate contributes to the final color, and the finished job may not look quite like what you had planned. It's a good idea to test the stain in an inconspicuous place before applying en masse to make sure it will produce the color you want.
Another bit of advice: An acrylic solid color stain will offer best results for heavily knotted wood, as semi-transparent stains will not hide the knots completely.
If the cedar has never been painted or stained but has been exposed to the elements for more than 60 days, evaluate the level of decay before proceeding. Any loose, fibery, gray-looking areas should be lightly abraded prior to coating.
If the original paint is intact, cedar siding can be repainted with one coat of Duration.
Vinyl
Before painting vinyl siding, scrub with a warm, soapy water solution, rinse thoroughly and allow plenty of time to dry. Be alert for mildew as well; if present, use a bleach solution to eliminate prior to painting. Priming is not generally necessary if you use Duration or Sherwin-Williams SuperPaint Exterior Latex. Use one coat of Duration or two coats of SuperPaint. Apply with a brush, roller or sprayer as the job parameters dictate.
If the surface of the vinyl remains slick and ultra-smooth after you've cleaned it with a strong detergent, you'll need to use a bonding primer such as Sherwin-Williams PrepRite Bonding Primer to achieve quality results.
Caution: Never paint vinyl siding a darker color than the original hue. Heat build-up can create heat distortion and cause the siding to buckle or warp. Also, if the siding manufacturer recommends against painting, there must be a good reason. Don't paint it.
Aluminum
Aluminum siding should be power washed with the correct detergent to rid the surface of chalk, oil and other foreign materials prior to painting. If there are still dark spots on the surface, test for mold by applying a few drops of household bleach to the area. If the spots bleach away, they're probably mildew. In that case, eliminate the rest with one part bleach to three parts water.
Unless it has a super-slick surface, aluminum siding rarely needs to be primed. Simply apply one coat of Duration by either brushing, spraying or rolling. Unless the surface is bent or damaged, you can achieve a terrific, factory-finished look by using Duration Satin.
Stucco and masonry
The trick with repainting stucco and masonry is to powerwash or clean the loose powdery surface well enough without destroying it. New stucco always should be primed or conditioned for optimal results. Since pH levels can be a concern with new stucco, make sure the primer can be applied to surfaces with a high pH level. This will minimize efflorescence problems later on. You'll get maximum performance from Sherwin-Williams Loxon Masonry Primer. For the topcoat, use two coats of SuperPaint or one coat of Duration.
The condition of the substrate is critical when repainting. Stucco cracks will telegraph through the topcoat and should be repaired with patches and sealants prior to repainting. Repaint the substrate with SuperPaint or Duration. If the job calls for waterproof protection, go with an elastomeric coating such as Sherwin-Williams ConFlex XL High Build Coating, which also can cover and hide hairline cracks.
Brick should be allowed to weather for at least a year and then wire brushed to remove efflorescence. Treat the bare brick with one coat of Loxon Conditioner before painting with a masonry compatible latex paint like SuperPaint, or, better yet, Duration.
Prep Makes Perfect
Paint failure is generally a symptom of poor surface preparation. Thoroughly cleaning the surface assures proper bonding of the paint and helps you get the most from your topcoat. Other considerations:
Old paint: Make sure glossy surfaces of old paint films are clean and dull before repainting.
Wood rot: Fix the water or moisture problem before painting. You may want to call a carpenter.
Efflorescence: If you see white fluffy deposits of salt crystals on the surface, scrub them off before painting.
Mildew: If there is the appearance of dirt even after washing, chances are there is mildew on the surface. Scrub with a solution of one part bleach and three parts water. (Wear rubber gloves and eye protection.) Allow to stand on the surface for 10 minutes, then rinse thoroughly. Repeat as necessary. Allow the surface to dry for 48 hours before painting.
Weather: Never paint immediately after a rain, when rain is predicted or during foggy weather. As a general rule, humidity should be no more than 85 percent. Avoid painting when temperatures rise above 90° F or fall below 50° F, unless the products are designed to be used under those circumstances.


