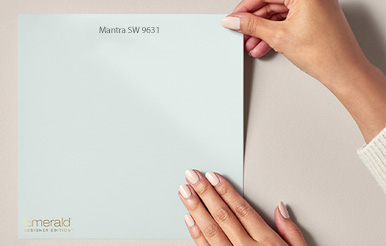
Your walls are prepped and primed. Now, it's time to paint your ceiling, walls and trim with your topcoat.
In this video you'll learn how to paint a room. We'll show you how to paint your ceilings, how to paint your walls and how to paint your trim. Watch how painting parts of your room in the right order contributes to superior results and how applying paint in the right pattern can ensure a seamless look once your paint has dried. Plus, we'll share tips on how to tape-off areas and how to choose the best roller cover and best paint brush for the job.
Tips for Painting Ceilings, Walls & Trim
Materials Checklist
- Paint
- Plastic paint container
- Roller pan/tray
- Paint stir sticks
- 2-inch to 3-inch angled sash paint brush
- Paint roller
- Paint roller covers
- Paint roller extension pole (if needed)
- Drop cloth
- Painter’s tape
- Paint rags
- Ladder
General Tips
Order Matters
Paint ceilings first, then walls, and save trim for last.
Proper Use of Your BrushHold your brush near the base of the handle (just above the bristles). Dip the bristles into your paint container until they are roughly half covered in paint and gently tap them on the inside lip of the container. Wiping your bristles on the can is not advised and will take too much paint off of your brush. Paint with enough pressure to bend the bristles slightly — but don’t push too hard or the paint may drip.
Step 1: Painting Ceilings
Quick Tip: Your ceiling doesn’t have to be white. Think of it as a colorful fifth wall to enhance the mood and elegance of your room.
Start along the edges with a brushBegin by painting along the shorter length of your room. For example, if your room is 20’ X 12’, start alongside one of the 12’ walls.
Using an angle bristle brush, carefully paint a 2-inch to 3-inch strip along where the ceiling meets the wall or alongside your wall’s crown molding. Refer to Episode #3 for tips on applying painter’s tape to your crown molding or walls.
Switch to a roller while the edge paint is still wetWhile the paint strip along the ceiling edge is still wet, switch to a roller and apply paint overlapping onto the wet edge. Come as close to the edge as possible. This will help ensure a seamless, uniform look once the paint has dried.
For higher ceilings or just to make things easier, attach your roller to an extension pole. Most rollers screw right onto the pole just like a push broom.
Roller nap thicknessIf your ceiling is smooth, use a shorter nap roller. If you have a textured ceiling, use a thicker nap roller.
Step 2: Painting Walls
Start along the edges with a brushUsing an angle brush, start by painting a 2-inch to 3-inch strip along your ceiling, floor/baseboards, trim, and inside corners where two walls meet.
A 2-inch or 2-½ inch brush offers good control, ideal for detail work like painting close (cutting in) around window and door trim.
Switch to a roller while the edge paint is still wetWhile the paint strip along the wall edge and trim is still wet, switch to a roller and apply paint overlapping onto the wet edge. Come as close to the edge as possible. This will help ensure a seamless, uniform look once the paint has dried.
Rolling in an N-pattern, begin your roller strokes in a dry area of the wall and work back towards the area of the wall you just painted, overlapping onto the wet paint.
For larger spacesFor a larger room, it may be difficult to work quickly enough to ensure your paint strip is still wet by the time you switch over to rolling. In these cases, you may want to edge and finish smaller portions of the walls at a time.
Step 3: Painting Trim/Molding
Quick Tip: Your newly painted walls should be thoroughly dry before you apply painter’s tape to walls alongside your trim.
Painter’s tape tips
Using longer pieces of tape instead of several shorter pieces will help prevent paint from seeping through the tape.
Start in a corner and slowly unroll the tape, making sure you’re butting the tape right up against the trim.
Press the tape to the wall in small sections. To ensure the tape sticks firmly to your wall, carefully press the tape edges using a clean putty knife. This will make sure you get a nice, even paint line.
To remove the tape, wait until your trim paint is dry to the touch and then slowly peel the tape back over itself.
Brush tipsQuick Tip: Use a semi-gloss or high gloss finish paint on your trim to make it stand out from your walls.
A 2-inch angled sash brush is generally best for painting trim.
Apply paint to trim in longer smooth strokes, always in the same direction.
Start subsequent strokes of the brush in a dry area, working back towards the wet painted area.
Have more questions? Go to your neighborhood Sherwin-Williams store, walk in, and ask an expert … in that order.Click here for a printable materials checklist and step-by-step guidance.


