Because no special tools are needed, finishing wood is the ideal first project for a new do-it-yourselfer. In fact, the most useful finishing and refinishing tools are improvised from things found around the house, such as an old toothbrush.
Working on your home and furnishings can be both fun and rewarding if you follow simple safety guidelines. For the best results and your own safety, remember to read and follow all label warnings and instructions carefully.
Warning! Removal of old paint by sanding, scraping or other means may generate dust or fumes that contain lead. Exposure to lead dust or fumes may cause brain damage or other adverse health effects, especially in children or pregnant women. Controlling exposure to lead or other hazardous substances requires the use of proper protective equipment, such as a properly fitted respirator (NIOSH approved) and proper containment and cleanup. For more information, call (in the U.S.) the National Lead Information Center at 1-800-424-LEAD or contact your local health authority.
To preserve that glowing quality wood gets with age, we suggest you not sand refinished wood. Refinishing floors is one exception. And of course, you may have to sand a piece that has been stripped with materials that have raised the grain or to remove imbedded wax or stearates.
Make sure all hardware is removed, including hinges. Mask mirror with tape if it cannot be removed.
Sand off glue on any spot to be stained; otherwise, stain will not penetrate.
Wipe wood surface with a tack rag or cloth dampened with mineral spirits.
In addition to friendly, expert advice, your neighborhood Sherwin-Williams store has all the materials you need to achieve professional-looking results.
Wood Preparation
Wood must be dry and cleaned of dirt, grease, wax, polish, marks and old finishes.
Start with a medium grade of sandpaper (e.g., #120) and gradually work your way to a finer grade (e.g., #220). Sand in the direction of the grain for a smooth, uniform finish, and remove all sanding dust, using a vacuum, dry paint brush or tack cloth, before finishing.
The "Fingernail" Test
Determine if you have a soft wood or a hard wood. If your fingernail dents the surface when you scratch it, you have a soft wood. Since soft woods tend to absorb stain unevenly, pretreat the wood using Minwax Pre-Stain Wood Conditioner before staining. This extra step will help you control stain color penetration and prevent blotchiness.
Choosing a Color
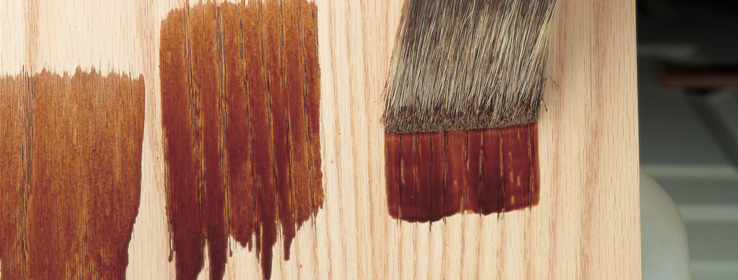
Your finished color is determined by many factors, from the color of the stain selected to how long the stain is left on. But remember: Different species of wood absorb stain differently. Test the color on an inconspicuous area before you start staining most visible parts of your project.
Choosing The Proper Applicator
Stains may be applied with clean rags, cheesecloth, brushes and other applicators.
Use natural-bristle brushes when working with oil-based products. They are not recommended for use with water-based products.
Both polyester bristles (medium-to high-quality brushes) and nylon bristles (low-to medium-quality brushes) should be used for water-based finishes.
Stirred, Not Shaken
Ingredients in stains and finishes can settle over time. Stir until all settlement is evenly dispersed. Shaking will only add unwanted bubbles to the product.


