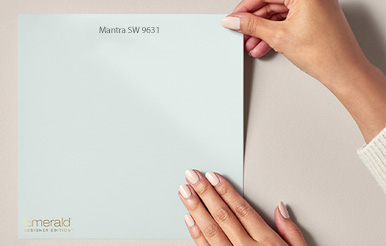
Learn how to give a blank wall some personality with squares. Squares are a great decorative painting technique for your walls. Read the steps below on how to paint squares to your wall.
Watch the Video on How to Paint Squares
Supplies Needed:
Two different paint colors – Basecoat and coordinating color for square pattern
1" or 2" low-tack/safe-release tape
9" roller frame and cover
Mini roller frame and cover
Roller pan with liner
Pencil, colored pencil or chalk to mark lines
Tape measure, carpenters level, straight edge
Utility knife
Step 1:
When you have all your supplies ready, and the room cleared for painting, paint your base coat of paint on the wall using the lighter of the two colors you have decided to use. Let it dry at least 4 hours or overnight for best results.
Step 2:
Measure your wall for length and height. Then divide the length and height by the measurement of the desired square size. Mark the squares using a carpenter's level, a pencil (or chalk) and low-tack painter's tape. Make adjustments to the size of your squares as needed to fit the size of your wall. Lay out your grid on the wall. Begin by measuring the desired size of the square down from the top of the wall and use small and light pencil marks going across the wall. (Marks may show through).
Tip: Make the squares all one size with a set pattern (checkerboard) or do a variety of different sizes in a random pattern.
Step 3:
Place a horizontal strip of tape across the wall with the top edge of the tape at your first measurement. Press the tape edges down firmly to prevent the second color from bleeding into the adjacent square. From the bottom edge of the tape strip just applied, measure the desired size of the square down and apply your next strip of tape.
Continue to apply horizontal strips of tape all the way down the wall. Check your lines with a carpenter's level occasionally, to make sure they are true.
Step 4:
Starting at the left edge of the wall, measure the desired size of the square across and make a vertical cut in the tape with a utility knife. From that point, measure across the tape, just the width of your tape and make another cut. Remove the cut section of tape you created. This cut section will be the width of the tape only.
This is where you will lay your vertical strips of painter's tape to make your squares. Measure across the desired square size from the cut section, cut and remove another tape-wide section. Repeat the process across the rest of the wall space.
Step 5:
To complete the block pattern, apply vertical strips of tape crossing through the cut spaces you just made. Continue until the wall has your checkerboard pattern. Be sure to press the tape edges down firmly to prevent the second color from bleeding into the adjacent box.
Step 6:
Paint and fill in the squares with the topcoat (second color) using a mini roller. Fill in every other box down and across, using the same technique.
Step 7:
Allow to dry and remove the tape OR Remove the tape once you've painted the wall, angling away from the freshly painted area as you pull.
Video Transcription:
Transform plain solid colored walls into works of art with painted squares.
They can be one size with a set pattern or a variety of sizes in a random pattern.
It's up to you and your imagination.
In this video, we'll show you how to create a checkerboard pattern or equally sized squares on a wall.
Step 1: Preparation.
Think about the design you'd like to create.
How many colors do you want to use?
How many squares?
will the squares be large or small
Will you use two different Sheens?
You'll also need to know the dimensions of your wall.
Determine the height and width of the wall, then divide both by the size of square you'd like.
This tells you how many squares will fill the wall.
For example, let's say your wall is 8 feet high and 12 feet wide and you want two foot squares.
With those measurements, you'll have 4 squares vertically and 6 squares horizontally.
Once you've determined your measurements and design, gather the right tools for your project at your neighborhood Sherwin Williams store.
Choose your paint colors, one color is the base coat and the others are coordinating colors,which create the square pattern.
Make sure you have the following supplies: 1 or 2 inch low-tax safe-release tape, a 9-inch roller frame and cover, mini roller frame and cover, roller pan with liner, tape measure, carpenter's level, straight edge, utility knife, and a pencil.
Step 2: Paint the base coat.
You can use your existing wall color as the base coat or apply a new color.
If you apply a new color, let it dry for at least four hours or overnight for best results.
Step 3: Mark the horizontal and vertical lines for the square pattern.
Start at the top of the wall and measure and mark the horizontal lines, according to the size of your square pattern.
Do the same for your vertical lines.
If you're using a chalk line, use blue chalk because red and yellow are permanent.
Step 4: Apply tape.
Determine which squares you want to paint the coordinating color and firmly apply tape on the outside of each square.
Then, cut and remove the excess tape in the corners of the squares you're going to paint.
The last step is to paint the squares.
Before you get started, put a piece of tape in the squares you're not going to paint for reference.
Use a mini roller to fill in the squares with your coordinating color.
Paint every other box across and down.
Let it dry for at least four hours.
Then remove the tape by anchoring it away from the painted squares.
Creating original art on your walls is easy with Sherwin-Williams.
Whether your squares are equally sized or random, you'll love how they shape up your room.
For more information about other decorative techniques or Sherwin-Williams, visit sherwin-williams.com


